How to Build a Gaming PC: a Step-by-Step Guide
Graphic card and RAM shortages mean that in 2026, it is extremely easy for your “budget PC” to turn into an investment of months and months’ worth of your hard-earned wages. Yet for some ambitious part buyers, home-built rigs are still the preferred way to go. With sticks of RAM costing weeks’ worth of wages for most workers, mistakes cannot be made anymore, yet most people are still making them
Do you need flexibility when building your own custom gaming PC? Don’t know where to start? Well, in this guide, we’ll cover everything about how to build a custom gaming PC, including the costs of building one yourself and the steps involved. Here is a straightforward, step-by-step guide if you choose to do it yourself.
Patience is necessary. Compatibility problems can be avoided by using a bespoke PC builder or just asking one of our customer service agents. A custom PC builder allows you to sort through your chosen parts and gives you the best of both worlds.
Table of contents:
- What do you need to build a Gaming PC?
- How long does it take to build your own PC?
- Is it cheaper to build your own PC?
- What voids your part warranty?
- How to Build a PC, Step by Step
- Should you build your own PC or buy your own?
- How much does it cost to build your own PC?
- Custom gaming PC FAQs
- The value of custom PCs
What do you need to build your own PC?
Choosing components can be an arduous task, but choose carefully. Not all of the best components are compatible with each other, with size and form factor being major considerations. Always be mindful of component upgradability, wear and tear if you’re choosing secondhand parts, port counts, and what you might need in the future that you haven’t considered yet. The following are the basic, necessary components for a functional PC:
1. Processor (CPU)
The right CPU (central processing unit) for you depends entirely on your needs and budget. The more cores you have, generally, the more expensive your CPU will be. However, a CPU with more cores is more likely to age gracefully over a 6-core CPU, which may be reasonable for gaming now but will likely be far too outdated in the future to run triple-A games. Unlike the current choice of GPUs, which is basically a two-way street- you have a few brand options for central processing units for gaming.
Some budget-friendly central processing units may come with a stock cooler, but if not, or if you want the best experience, you’ll want to opt for a 3rd party extra cooling component.
2. Graphics Processing Unit (GPU) and graphics cards
For gamers, a GPU is the biggest part of your build, vital for the best possible performance and likely to be the most expensive portion of your build, unless you’re looking to use your CPU’s integrated GPU (not recommended). Modern-day graphics cards complete complex calculations, multitudes of them at a time and the amount of calculations has increased significantly since the early days of gaming, which is why it is essential to know what you’re looking for and why when choosing a graphics card.
3. Motherboard
There are three main motherboard sizes: ATX, micro-ATX, and mini-ATX. Considering the size of your case and space limitations is paramount when choosing your motherboard, since everything is connected to it. The ideal motherboard for you may have a variety of ports, memory slots for RAM, expansion slots for NVME and PCI, and SATA connectors for SSDs or HDDs. You also need to consider compatibility and the socket type your motherboard has to accommodate your CPU. A motherboard equipped with the wrong bracket type might set your build back a few days waiting for a new part, so ensure your PC comes fully equipped with the fixtures you need.
4. Memory (RAM)
Ensuring fluid gameplay and multitasking. RAM (random-access memory) is the short-term memory for running applications and is another important factor to consider when determining what you want to accomplish with your setup and how to future-proof it. Most systems nowadays require at least 16GB, however an upgrade to 32GB is going to keep you up and running for much longer.
5. Storage (SSD vs HDD)
Optional long-term storage solutions for extra documents, photos and video storage. SSDs are physically more durable, faster, and more compact than HDDs, whilst HDDs have a longer lifespan and more storage for less expense. Find out more in our comprehensive guide to HDDs vs SSDs.
6. Power Supply (PSU)
The boring part, but still important: The Power Supply Unit (PSU) offers consistent power. Choosing the right power supply for your computer depends on the demands of your components: the size of your motherboard, your CPU’s brand, socket, and model, the number and size of SSDs/HDDs, which optical drive you have, and the brand and model of your GPU.
7. PC Case
All components are held and protected by the case. You might choose to customise yours; if so, there are multiple options available in our PC builder. You may opt for engraved glass or non-standard colours, possibly from the VIVID range. Whatever your choice, consider ventilation, component sizes and where you want to store your tower when choosing between mid-size and mini towers.
8. Cooling (Air vs Liquid)
For cooling options, there’s a variety of customisation options, from fan sizes and colours to RGB lighting and the colour of your liquid coolant. If you’re opting for the full gamer rig and want RGB fans to match your cyber set-up, make sure to choose reversible fans and install them the correct way around so that air is being brought into the system and expelled correctly. Liquid cooling is optimal, but poor installation of all-in-one systems can be hugely problematic, so be sure you know what you’re doing. Check out our guide on the differences between liquid cooling and AIO systems.
9. Tools and Accessories
Ensure your space is well-lit and suitable for an easy build experience. Generally, you’ll need a couple of different sizes of Phillips screwdrivers for PC assembly, and you might also need zip-ties for proper cable management and just in case, really. Thermal paste is an absolute must: which one to pick and why it’s important are key to your success. Do your research on thermal paste application or purchase thermal pads if you’re unsure. You can also pick up a cleaning kit for your screen, chassis and keyboard. Cleaning kits are not advised for use on internal components.
10. Operating System and Software
If your chosen operating system is Windows, it’s a simple matter of purchasing the licensing option you want and installing it. There are other OS options out there, but they can be complex to install and manage and may not meet your software requirements.
You’ll also need to install your motherboard’s and GPU’s drivers and ensure they are up to date. This includes drivers for Wifi and Bluetooth. For extra protection, a good anti-virus software is always recommended. Our in-house custom-built and pre-built PCs and laptops come with 1 year of Norton antivirus, so you won’t need to worry about shuffling free trials.Building a PC isn’t just the physical installation of parts, but the
How Long Does It Take to Build a PC?
Your build time depends entirely on your experience, competence, parts, and how much patience you have. A thorough understanding of troubleshooting and building could save you tens of hours.
- First-time builders, a lot can go wrong before you’ve even started building. For a real beginner, build time can take up to 6 hours. However, if you reach the end of your build and encounter troubleshooting issues, you may need to disassemble and reassemble your entire rig to find the problem. Poor installation PC either now or later, so great care is warranted.
- For an experienced builder, a custom build may take as little as a couple of hours, but even then, costly mistakes can be made.
- In-house builders at CyberPowerPC overcome challenges with new component compatibility, and fixtures are built to high standards through expert handling backed by hundreds of hours of build experience. A pre-built PC can be delivered next-day.
Is it cheaper to build your own PC?
You might be thinking: Is a custom gaming PC cheaper than a prebuilt PC? And that question entirely revolves around how much money you want to spend on your custom build. Depending on which parts you choose, it can be cheaper than a pre-built desktop.
There are many hidden costs when building your own PC, including component costs. This can affect you in the long run if you don’t know what you are choosing in terms of component compatibility, and it will have a huge impact on the total cost.
Other examples of hidden costs include tools and accessories, as well as other gear you need to put the PC together. It will cost you if you don’t already have them in your roster.
Screwdrivers, anti-static gear, thermal paste, and other tools add up.
Voiding your Warranty
You are prone to mistakes when building a PC yourself as an amateur. It’s not as easy as LEGO; common mistakes can be costly, including brute forcing parts into place, purchasing incompatible components, cooling systems, motherboards, CPUs, and GPUs all need to work in tandem, or you might install everything and end up with a faulty unit.
What can void your part warranty?
Generally, misuse and neglect will void your part’s warranty. You might be familiar with the dread of dropping your phone in the toilet or spilling coffee on your laptop keyboard; accidents happen. Incidents that void your warranty, particularly when it comes to your CPU and motherboard, are usually much more subtle. These can include:
- thermal paste leaks
- a bent pin half the size of your thumbnail
- Scratches and wear marking the part’s reference legibility
- Static charge
- Power surges
- Overheating
You bear responsibility for your home build and, as a result, you shoulder the cost for most faults.
An extremely common mistake that may not void your warranty but can make you ineligible for a refund is buying incompatible components. This may result in failure to meet the conditions for a refund, and you’re then facing the possibility of reselling the part(s) at a loss.
A PC bought from a builder is entirely under warranty, depending on the manufacturer’s conditions. Whilst parts are under their own terms, and for some popular retailers, their warranties might last up to a year, CyberPowerPC warranty options for parts last up to 3 years, and for labour costs, up to 5 years.
Pre-built PCs can offer you convenience and reliability. There’s no need to worry about your own capabilities in understanding the complexities of PC components.
If you crave extra customisation options, try ourEZ-PC builder, which will also ensure that all the parts you are choosing are compatible with the rest of the PC.
How to Build a PC, Step by Step
Step 1: Prepare Your Workspace
Take precautions to ensure there is nothing that might generate static on your desk, particularly anywhere near your motherboard. Static materials you’ll want to avoid include nylon, wool, lead and cotton, whilst a wooden surface is basically neutral and ideal. You can also arm yourself with an anti-static wristband for extra protection; don’t wear socks when walking on carpet, and occasionally touch the metal of your chassis to ground yourself. These measures aren’t necessarily required, and there’s scepticism around whether static is an issue at all for modern-day components.
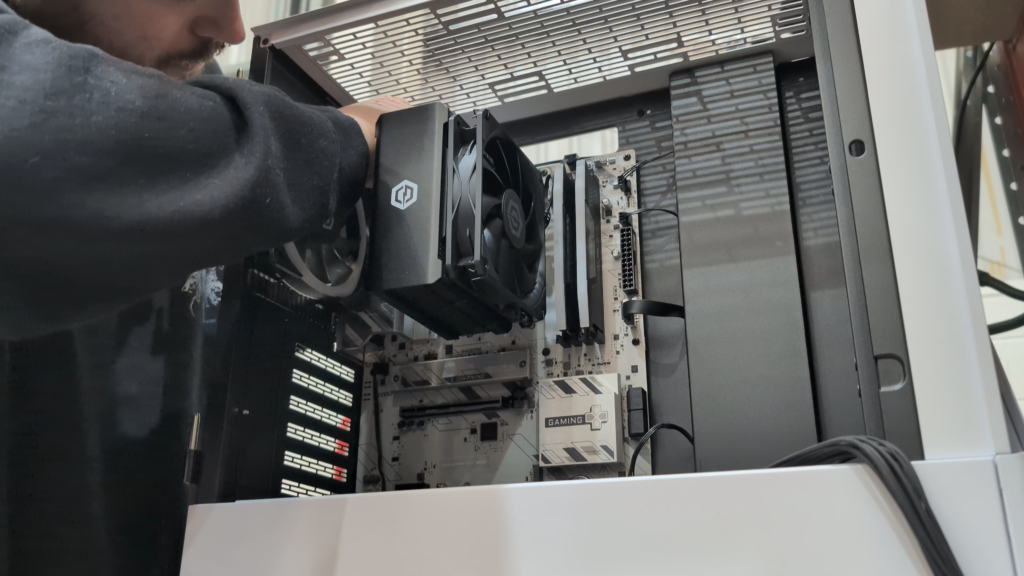
Step 2: Install the CPU, RAM, and Cooler
CPU installation depends on your motherboard’s socket. The CPU has gold prongs on the back; if bent, they could render your CPU non-functional, so be cautious during installation. Different CPUs and motherboards may install differently depending on your motherboard’s sockets and your PC case.
How to Install Your CPU
The majority of CPU chips are installed as follows: Begin by pressing down and raising the latch on the side of the CPU’s square-shaped socket to release the retention bracket.
Raise the bracket to expose the socket, and align the small triangle at the top left of the bracket with the corresponding triangle on the CPU.
Gently place the CPU into the socket. Lower the bracket and push the latch down until it engages.
You might hear the sound of pins bending, but as long as the CPU is properly in place, this is perfectly normal. Remove the cap, which should pop off automatically.
How to Install RAM
Installing RAM is fairly simple. Line up the notch on the RAM stick with the corresponding slot’s notch on your motherboard, press in and make sure the RAM clicks into place; otherwise, you may have troubleshooting issues later down the line.
Step 3: Install the Motherboard in the Case
As stated earlier, your motherboard should be compatible with your PC chassis; the motherboard size compatibility is listed in your PC case’s specs. You may notice multiple prongs on the back of your PC case’s interior; these are known as standoffs. Your board should sit on these comfortably, ensuring no parts are compromised by the prongs, and conversely, your board isn’t wobbly or loose. Your standoffs should screw in properly
Step 4: Install Your PC’s GPU in 6 steps
GPU is delicate and expensive these days, so take the same precautions throughout your build until your chassis is closed and your PC is bootable. Your GPU should have a tab which locks it in place in the PCIe slot.
- Locate the top PCIe slot on your motherboard. You should typically use this top slot because it gives the GPU full, unrestricted access to bandwidth, yielding the best possible performance.
- Line up your GPU to see which expansion slots on the back of your PC case need to be removed to fit the card’s input/output ports.
- Unscrew these mesh covers and be sure to save the screws. Push the locking clip at the end of the motherboard’s PCIe slot back to fully open it, then align the GPU connector and press it in until it’s securely latched.
- Once the GPU is installed, it will require its own power supply, which simply plugs into the GPU’s power connectors – some lower-end cards can pull power directly from the motherboard.
- You can now screw the GPU into where the mesh covers used to be to counteract any sag, using your saved screws.
Note that once you’re set up and your PC is bootable, you should plug your monitor cable (HDMI or DisplayPort) directly into the back of the graphics card, not the motherboard.
Step 5: Install Storage and Power Supply
Your power supply should be helpfully labelled with pin slots of various sizes.
Locate the PSU enclosure, which is usually situated at the bottom of the PC case
Determine the correct orientation for your PSU exhaust fan, and slide the PSU into the enclosure
Secure the PSU to the back of the case using the four provided screws. A helpful tip is to thread all four screws in loosely at first so you can easily adjust the alignment, and then tighten them all down securely so the unit doesn’t rattle.
Feed your cables into their respective areas throughout your build to make sure they reach the associated components and push them in until they click. Do not use cables from previous PSUs or mix and match connectors. Use the cables that came with the new PSU.
Step 6: Cable Management and Final Checks
Be mindful of airflow within your build. If you’re using a closed chassis, be aware that your cooling system may be working overtime. The goal of fans and cooling systems is to move heat away from your components. Some processors may come with built-in cooling systems that could be dumping heat onto your motherboard. Ensure air moving through your rig can escape, keeping your build well-ventilated.
If you’re using an all-in-one cooler, make sure the pump is securely fastened to your CPU; otherwise, the plate won’t make good contact with it, and your CPU might fry. At best, you won’t be getting the most out of your cooling system.
Step 7: First Boot and Setup
Now you can finally turn on your PC. Ensure your BIOS is up to date, or you may miss out on key features that improve CPU performance or RAM usage. Install Windows by following the OS’s instructions, then update drivers for your chosen CPU and GPU. Head to your GPU manufacturer’s website (Nvidia, AMD, or Intel) to download and install the latest graphics drivers so your new GPU works properly. Alternatively, you can download current drivers from curated resource pages like robeytech.com
Should You Build Your Own Gaming PC or Buy One?
The choice to build your own PC or buy one depends on your motivation, ambition, and budget. Many of us love the idea of crafting our own bespoke options and that’s always an option for those with the time and money, but experts are also there to ensure a working product’s delivery whilst shouldering the risks.
When Building Makes Sense
Building a PC makes sense for hobbyists, tinkerers, and upgraders. If you’re planning to fit your own RAM upgrades or GPU, it helps to know your PC from the ground up.
When a Pre-Built or Custom PC Is Better
A custom-built and pre-built gaming PC is fantastic for gamers who want:
- Guaranteed compatibility
- Professional cable management
- Warranty and support
Common problems with home builds can still happen after you’ve fitted the whole PC. In a custom build, however, your main issue is ensuring you’re making the most of your hardware and understanding what you’re purchasing. Visit our pre-built gaming PC blog post to learn everything you need to know before making your choice.
How Much Does It Cost to Build a Gaming PC?
Here’s a guide to estimating the cost of building your own gaming PC; you can visit our gaming PC budget guide to keep costs down.
Entry / Beginner
- Budget: £700 – £900
- Use case: Basic gaming, general use
- Performance: 1080p at modest settings
- Notes: Older, second-hand or value components
Mid-Range / Mainstream
- Budget: £900– £1,500
- Use case: Strong 1080p and 1440p gaming
- Performance: High-fps, smooth experience
- Notes: Better cooling, quality parts, upgrade options
High-End / Enthusiast
- Budget: £1,800 – £3,000+
- Use case: 4K gaming, content creation, futureproofing
- Performance: Top-tier, premium builds
- Notes: Advanced cooling, premium aesthetics
Hidden Costs
So once you have all your components in the right places, how easy is it to get gaming? Firstly, your PC needs an operating system. You may choose Linux, a free operating system with a steep learning curve. If you prefer compatibility and practicality, Windows 11 Home is an easy install-and-go option and the preferred choice at £119.99.
Peripherals
A home-built setup may cost you hours of time, and as a result of your hard work, you might want to treat yourself to a bespoke matching keyboard, mouse, headphones and speakers. Additionally, if you plan to record content on the PC, you’ll want decent recording software or if you’re trying to record from a console, a decent video capture card and possibly a sound interface for precise audio recording.
Some streamers even opt for a second separate system for recording their stream.
Custom gaming PC Frequently Asked Questions
Is it possible to construct a gaming PC?
- Yes, but it calls for diligence and close attention to detail. Pre-built or specially assembled PCs could be simpler for novices.
Which specifications are ideal for a bespoke PC?
- High-end configurations can include the latest CPUs, RTX GPUs, and liquid-cooling systems, depending on your budget.
What distinguishes a bespoke gaming laptop from a custom gaming PC?
- For the money, a gaming PC is more powerful, larger, and significantly easier to upgrade. Although they are portable, gaming laptops are typically more costly for the same specifications.
Is it possible to stream or edit on a specialised gaming PC?
- Indeed, they are excellent for live broadcasting, video editing, and multitasking thanks to their powerful CPUs and GPUs, however one of our workstation systems may be better suited for the higher end of these workflows.
The Value of Custom PCs
Building your own PC can be the most cost-effective option and provides a sense of control and achievement. However, it requires research and carries the risk of incompatibility, making it challenging for beginners. On the other hand, prebuilt PCs offer convenience and security, knowing that the experts are taking care of your investment.
A Custom PC builder like ourPC Finder provides the ideal balance when building your PC. You still have control over the components you put into the PC, such as the CPU, GPU, RAM and so on. The experts will handle the complexities and time-consuming tasks, such as BIOS configuration, and will carry out thorough testing. This approach will deliver a fully customised PC that is guaranteed to work. Offering you that peace of mind!.Are you prepared to begin? Create your ideal custom gaming PC right now, hassle-free, at CyberPowerPC UK. Make sure to check out ourPC buying guide to help you figure out what you’re looking for and skip the guesswork!